Free Pattern
Granny Square Hot Water Bottle Cover
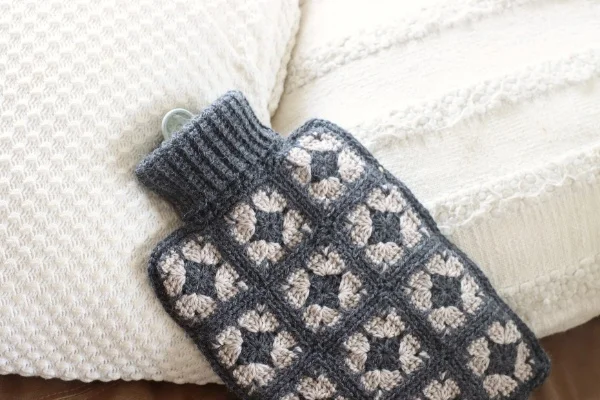
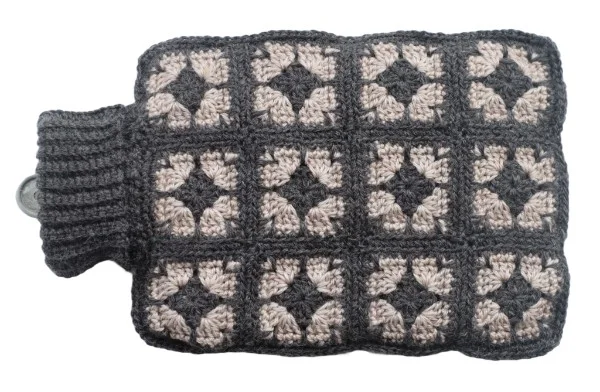
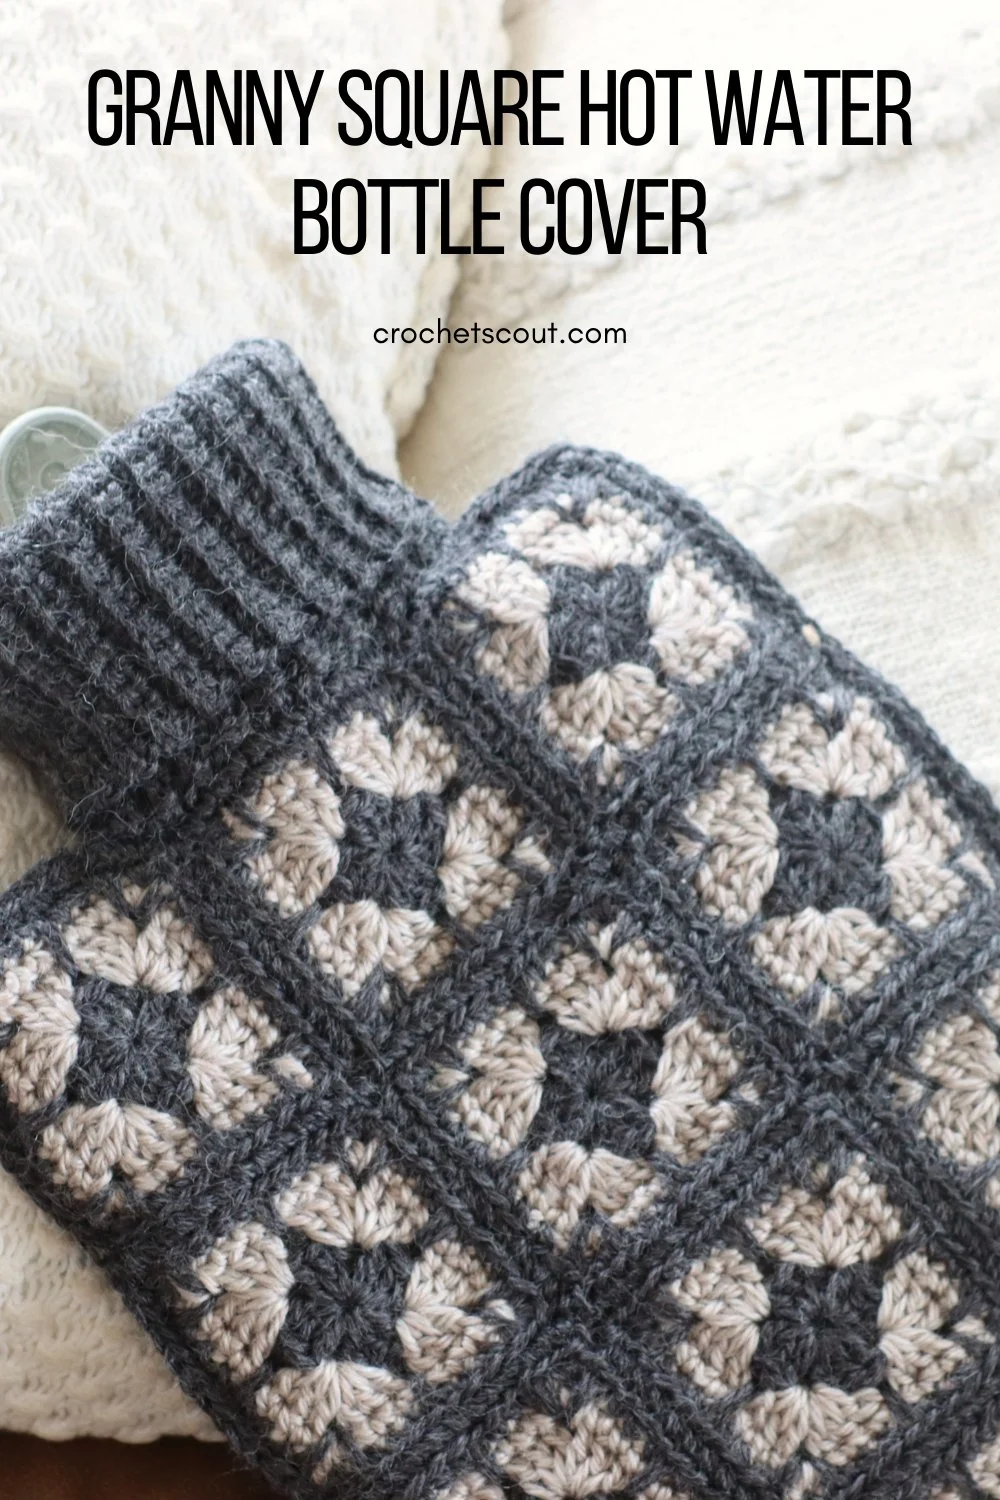
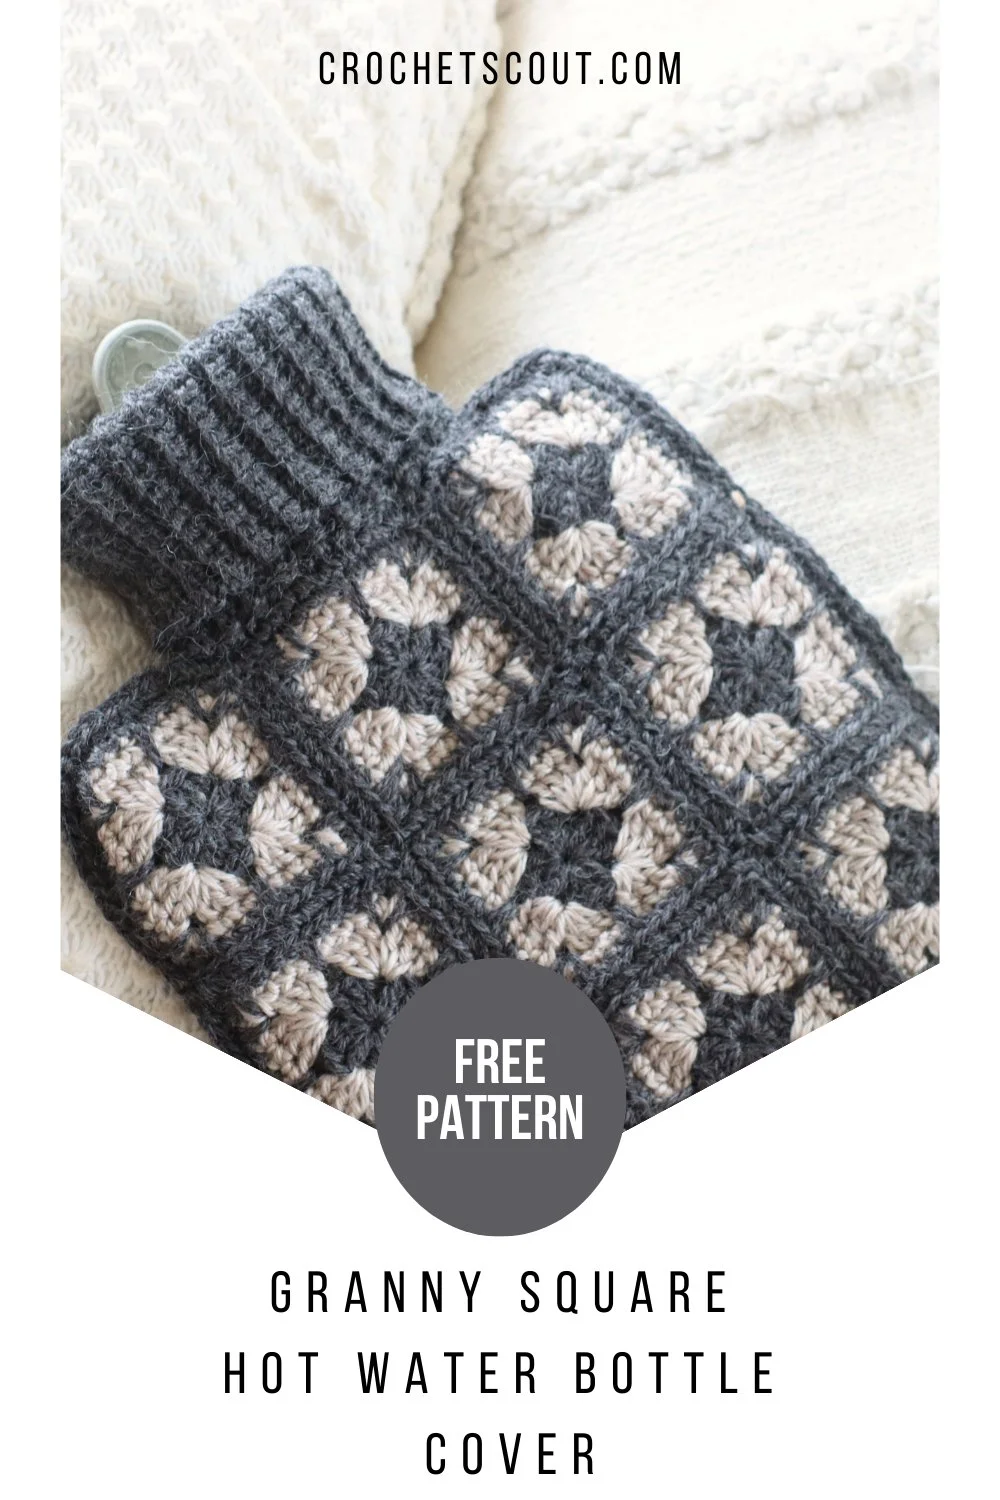
Learn how to make a granny square hot water bottle cover with this free crochet pattern. The cover is made with a cute little granny square featuring the spike stitch. It’s a simple variation on a traditional granny square and looks best when worked in two contrasting colours.
This is an easy pattern, but it is not suitable for absolute beginners. You will need to be familiar with basic crochet stitches and techniques.
Granny Square Hot Water Bottle Cover Supplies
Crochet Hook:
5 mm (H-8) crochet hook, or hook needed to obtain gauge.
You’ll also need a 4 mm (G-6) crochet hook for the ribbing.
Notions:
- two buttons
- scissors
- yarn needle
- measuring tape
- sewing needle
- sewing thread
Yarn
#4 medium/worsted weight yarn.
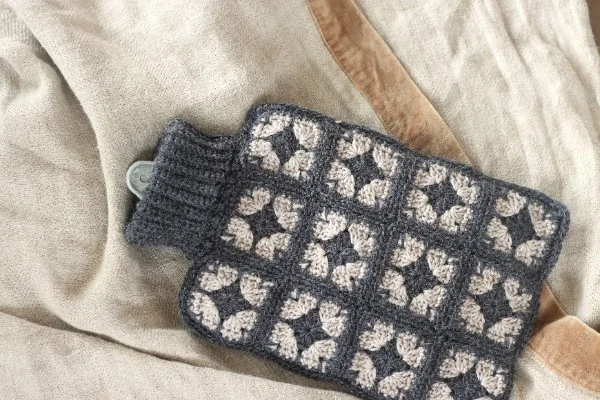
You will need yarn in two contrasting colours – referred to as Colour A and Colour B in the pattern. I used a charcoal grey for Colour A in my sample.
Notes
Skill Level
This is an easy/intermediate-level pattern and requires familiarity with working in the round and basic crochet stitches such as Single Crochet, Chain Stitch, Double Crochet, and Spike Stitch.
The squares are joined together with Single Crochet in the Back Loop, and the cuff/neck of the cover is worked in Single Crochet in the Back Loop Ribbing that is crocheted directly onto the body of the cover.
Gauge
The individual granny squares measure 3″ x 3″ (8 cm x 8 cm).
Finished Size:
This pattern fits a standard 2L hot water bottle. The finished cover measures 9″ wide and 12″ long, not including the folded cuff (22 cm x 30 cm).
Stitch Abbreviations
ch – chain
st/sts – stitch/stitches
sc – single crochet
dc – double crochet
sl st – slip stitch
sp – space
beg dc – beginning dc
mr – magic ring
Special Stitches/Techniques Used
Beginning Double Crochet – beg dc – sc, ch1.
The start of round one and round two is a Beginning Double Crochet. Usually, when you start a new round of Double Crochet, you use a ch2 or ch3. However, using chain stitches makes the squares look thinner than regular double crochets. To avoid any gaps and add a little extra bulk to the stitch, in this pattern, you will do a Beginning Double Crochet that consists of a Single Crochet stitch followed by a chain.
Single Crochet Spike Stitch – Worked as for standard Single Crochet, except that instead of working them into the tops of your stitches, you will be working them into the spaces in between the clusters of stitches in Row 2, drawing the yarn up to the same height as the current row.
Single Crochet in the Back Loop Only Ribbing – You’ll be attaching the ribbing directly to the hot water bottle cover as you work it. If you’ve never done this before, Toni from TL Yarn Crafts has an easy-to-follow tutorial.
Invisible Join – The invisible join is a neat and professional-looking way to finish your rounds. And I like to use it when I’m changing colours. Claudetta Crochet has a great YouTube tutorial demonstrating this technique. You can finish your rounds with a slip stitch if you prefer.
How to Make the Granny Square Hot Water Bottle Cover
- The pattern uses US crochet terms.
- The first two rounds begin with a “beg dc” followed by a ch1. This particular sequence of stitches involves working a single crochet, then a chain 2, followed by three double crochets. It’s easy to forget to do the second chain, so be sure to make a note of this.
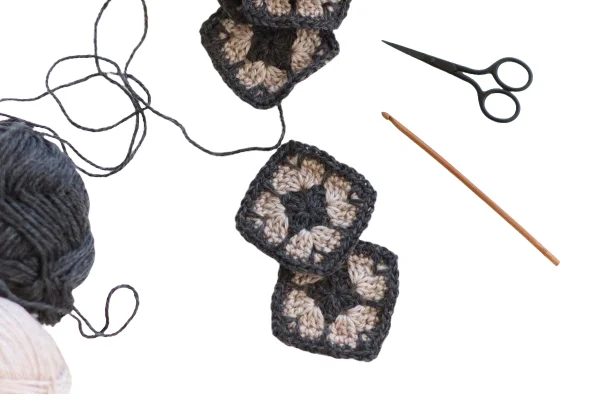
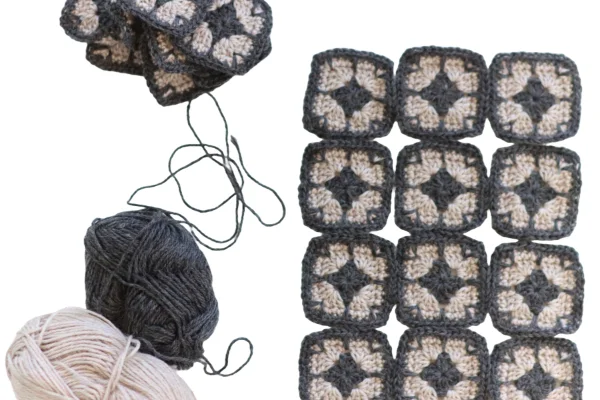
Make 24 Spike Stitch Granny Squares
Start with a magic ring.
Round 1:
Working with Colour A into the magic ring – Ch1, beg dc, 2dc, *ch1, 3dc; repeat from * twice.
Cut yarn and finish with an invisible join to the top of beg dc. Pull the tail of your magic ring tight to close the ring.
[12 double crochet stitches and 4 chains].
Round 2:
Working in Colour B join yarn in corner space.
Beg dc into corner space, ch1, 3 dc in same sp, *skip 3 sts and (3dc, ch1, 3dc) in next chain space; repeat from * three times, 2dc in beginning corner, sl st to top of beg dc.
[24 double crochet stitches and 4 chains].
Round 3:
Continue working in Colour B.
(sc, ch1, sc) into the corner spaces and sc into each st along sides.
Cut yarn and finish the round with an invisible join to the top of the first single crochet stitch of the round.
[32 single crochet stitches and 4 chains].
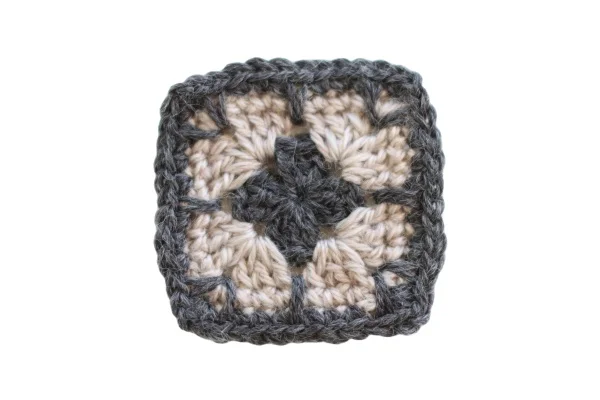
Round 4:
- Working in Colour A. Join contrasting yarn in a corner space.
- (sc, ch1, sc) in corner space, skip next st and work a spike stitch into the corner space of round 2, skip next st, sc in each of next three stitches, work a spike stitch in space between dc groups in round 2, sc in next three stitches.
- *Skip next sc and work a spike st in the corner space of Round 2, (sc, ch1, sc) in corner space, skip next st, spike st into corner space of round two, sc in next 3 sts, work a spike stitch in space between double crochet groups in round two, sc in next 3 sts; repeat from *two times.
- Skip next st and work a spike stitch into the corner space of Round 2.
- Cut yarn and finish the round with an invisible join to the top of the first single crochet stitch of the round.
Join the Squares
Next, we will join the Granny Squares together to form two rectangles – one for the front and one for the back. They are both joined differently as the back has an opening so you can easily take your hot water bottle in and out.
Join the Squares to Make the Front Piece
The front piece is a simple rectangle made by joining 12 of your squares together, as shown below.
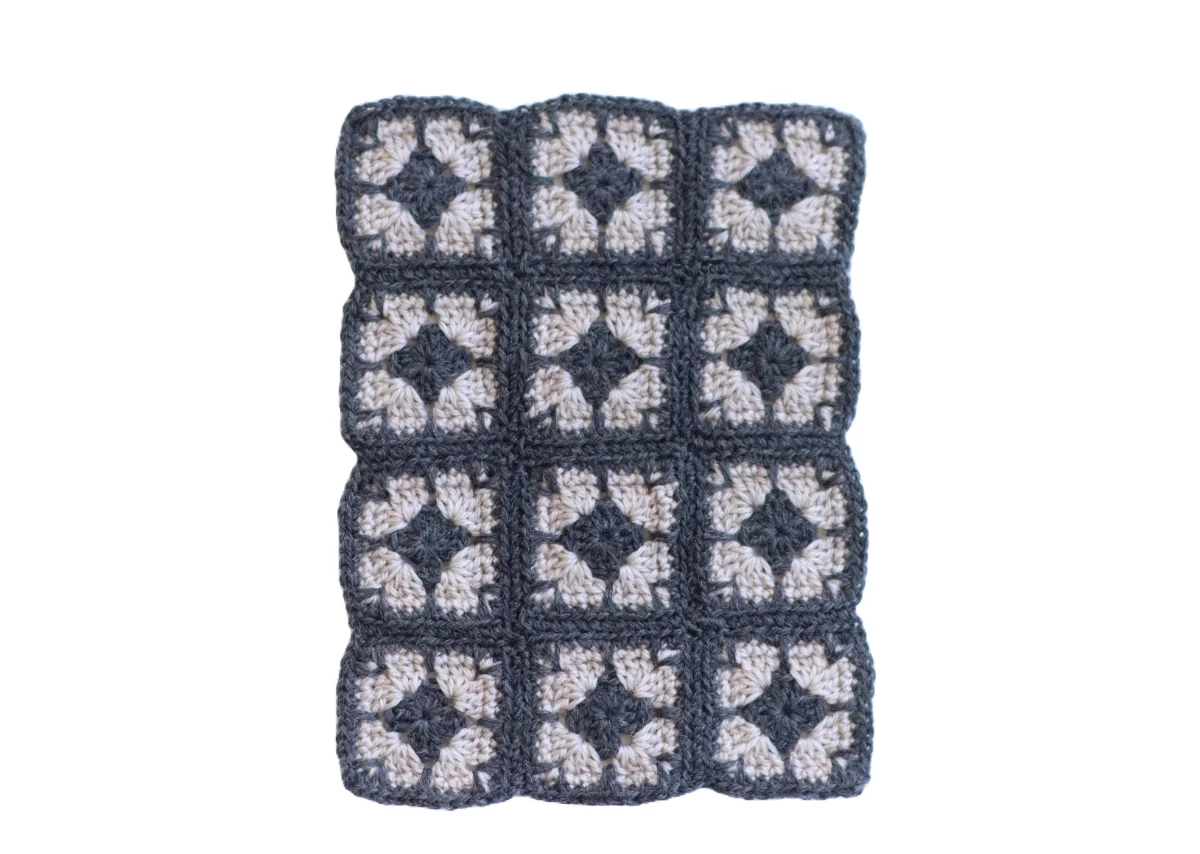
Hold your granny squares with the right sides together and single crochet through both layers, starting in the corner chain and working in the back loops (outer loops) only.
Joining your squares with Single Crochet is one of the easiest and quickest joining methods. If you’re not familiar with this specific method, Maria’s Blue Crayon has a good video tutorial.
Join the Squares for the Back Piece
Join the back pieces by following the schematic pictured below. The bottom half of the back is made by joining nine of your Granny squares together to make a square. Then, you need to make a separate piece for the top section by joining the remaining three squares together.
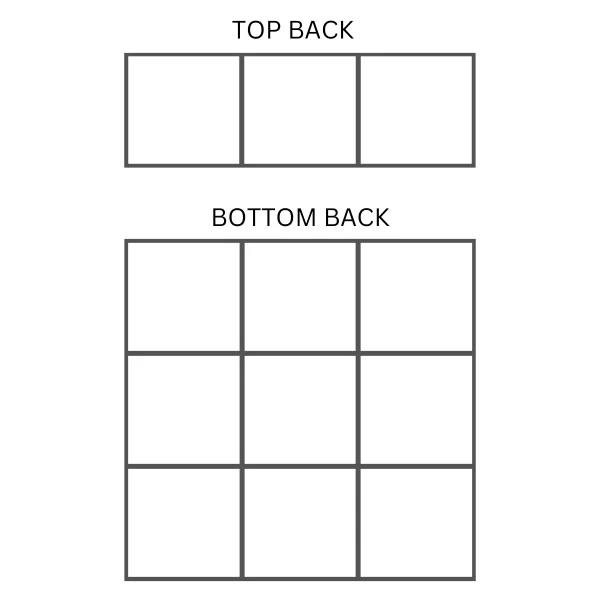
An opening is left between the top and bottom pieces so you can take your hot water bottle cover on and off. The next step is to finish the edges of the opening.
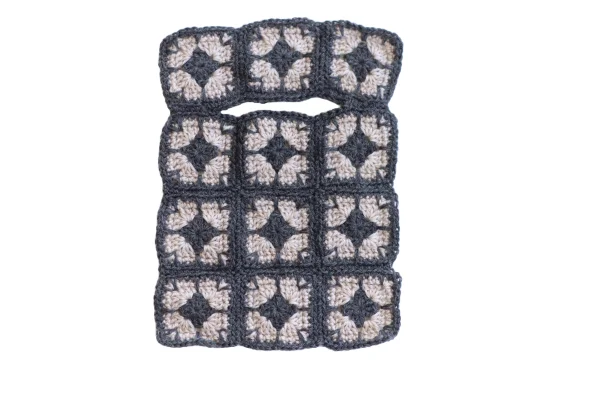
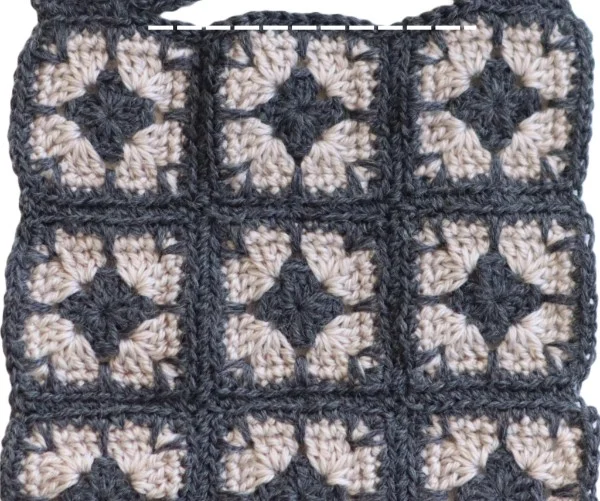
Slip Stitch Along the Bottom Edge of the Opening
Join your yarn to the bottom back piece and work a slip-stitch edge in the stitches shown in the image below.
The starting stitch is the second single crochet stitch after the centre spike stitch. Finish your slip-stitch edge in the corresponding stitch on the other side.
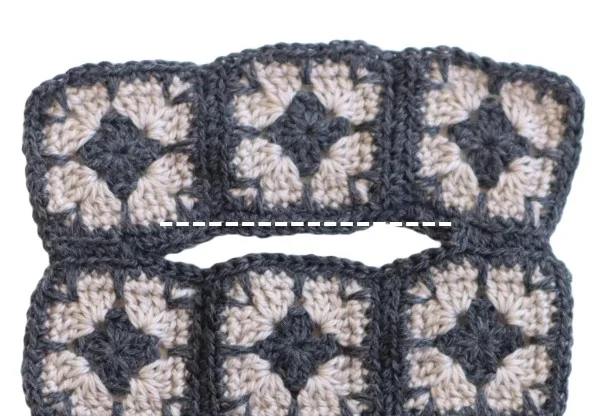
Single Crochet Edge on Top Back Opening
Join your yarn to the top back piece and work a single crochet edge along the section shown in the image below. The starting stitch is the second single crochet stitch after the centre spike stitch. Finish your single crochet edge in the corresponding stitch on the other side.
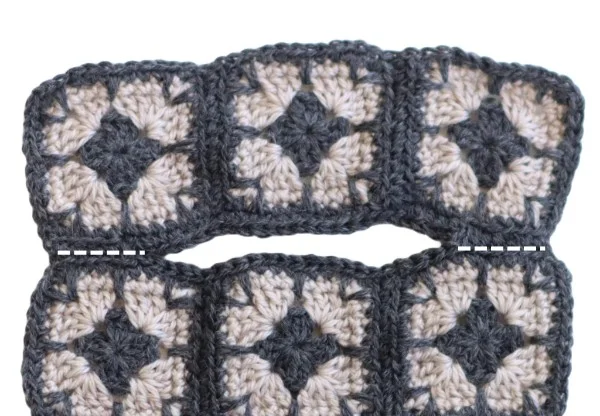
Join the Back Pieces Together
The next step is to join the top and bottom back pieces. Hold the two pieces, right sides together, and single crochet join as pictured below.
Join the Front & Back Pieces Together
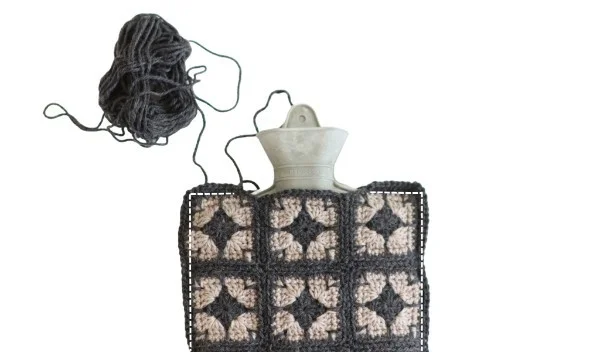
Join the front and back pieces together with a single crochet stitch. This time, you will hold the pieces with the wrong sides together.
Work single crochet stitches through both pieces in each stitch around, as shown (leaving an opening for the neck of the hot water bottle).
You will be working through the tops of all stitches, and in each corner, work three single crochets. Don’t cut your yarn.
Work the Ribbing
The neck of the hot water bottle is made with Single Crochet in the Back Loop ribbing.
To set up for the ribbing, work a round of single crochet stitches around the opening. Your yarn is still attached, where you joined the front and back pieces together. Just continue with a single crochet stitch in the next stitch and all the way around the opening. Join with a slip stitch to your first single crochet.
If you’re unsure of the ribbing, I recommend watching this tutorial.
Change to a 4 mm hook.
Chain 25.
Row 1:
Single crochet in the second chain from the hook. Continue working single crochet stitches along your chain [24 sc]. Slip stitch into the next two single crochets along the edge of the opening.
Row 2:
Turn, skip the two slip stitches and sc in the back loop only till you reach the end. [24 sc].
Row 3:
Turn, ch1, sc in blo [24 sc]. Slip stitch into the next two sc along the edge.
Repeat rows two and three until you have worked all the way around.
Join the two ends with slip-stitches. Cut your yarn and weave in all the ends.
Attach the buttons
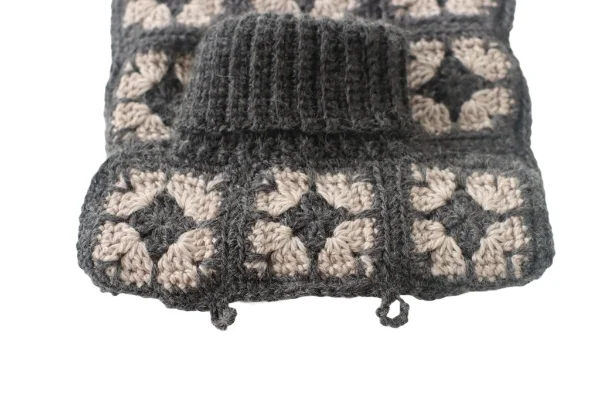
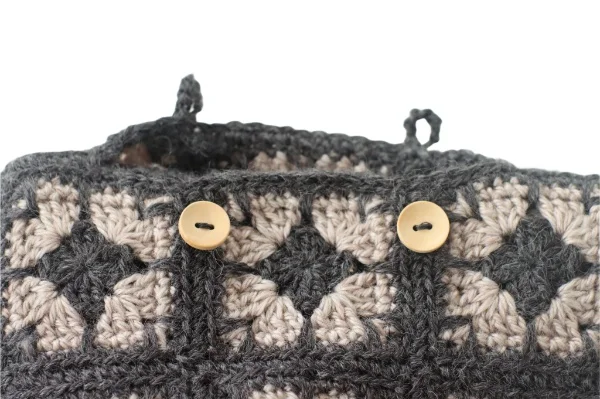
Join your yarn to the top edge of the back opening as shown and work seven chain stitches.
Cut your yarn and pull the end through your last chain to secure. Using a yarn needle, attach the end of your chain securely to your starting point to make a loop for your buttons. Weave in the ends.
Repeat for the other side.
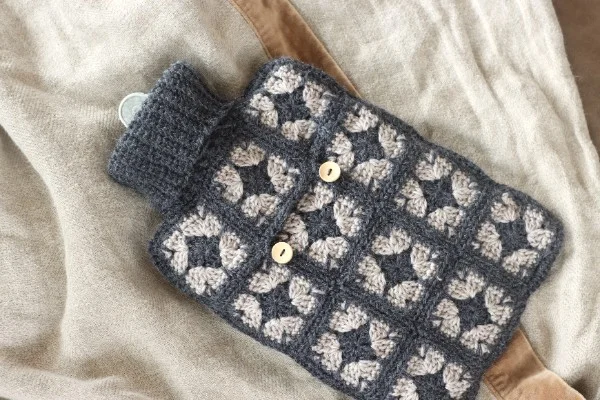
Sew the buttons to the bottom piece of the back as shown and your granny square hot water bottle cover is done!
You might like . . .


Leave a Reply