Free Pattern
Easy Tunisian Crochet Baby Top
The Little Honey pattern features my favourite Tunisian crochet stitch in a simple crochet baby top with cute tie straps.
The honeycomb stitch is a deceptively simple two-stitch pattern that looks much more intricate than it really is.
The construction method of this top is also straightforward. It’s created from a basic rectangle shape, featuring button closures at the back and straps that are crocheted using regular single crochet.
Tunisian crochet is something that I overlooked for a long time. If I came across a pattern that I liked the look of and it turned out to be Tunisian crochet, I just moved on, always assuming it was too difficult or tricky. But now that I’ve finally tried it, I’m hooked! And it’s surprisingly easy!

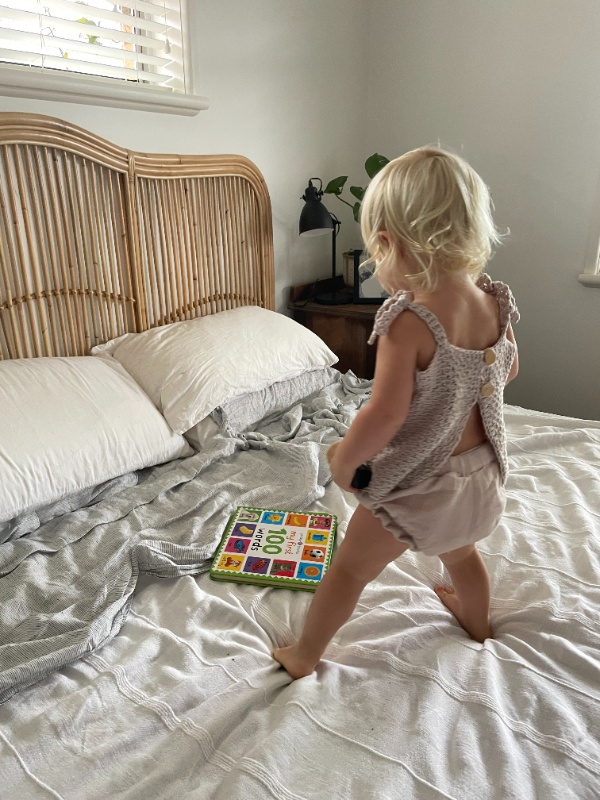
My beautiful little niece Milla was home with me last week and it was quite difficult getting pictures of her wearing this top. Toddlers are very, very busy!
Materials
Yarn:
#4 medium/worsted weight yarn, e.g., Nuboo from Lion Brand Yarn.
Nuboo has such a silky, soft feel. I loved working with it.
Crochet Hook:
A 7 mm Tunisian crochet hook with a cable. (Or the hook size needed to obtain the correct gauge).
You will also need a regular 4.5 mm crochet hook for the straps and a 5.25 mm hook for the shell stitch edging.
Notions:
- two buttons
- stitch markers
- scissors
- yarn needle
- measuring tape or gauge ruler
- sewing needle
- sewing thread
Pattern Notes
SIZE
To fit a Toddler – 18 months to 2½ years.
Skill Level
This is an easy-level pattern. It requires familiarity with the basics of Tunisian crochet, the Tunisian honeycomb stitch, regular single crochet stitch, double crochet, and slip stitch.
But if you have never tried Tunisian crochet, don’t let that stop you from giving this pattern a go!
Here are some helpful links that will teach you everything you need to make this top.
Special Stitches/Techniques Used
Tunisian Honeycomb Stitch – Tunisian Honeycomb stitch is a simple stitch repeat of alternating Tunisian Simple stitches and Tunisian Purl stitches.
Stitch Abbreviations
ch – chain
st/sts – stitch/stitches
sc – single crochet
dc – double crochet
yo – yarn over
Tss – Tunisian crochet simple stitch
Tps – Tunisian crochet purl stitch
Lts – last Tunisian stitch
RetP – return pass
Gauge
4″ = 14 rows x 15 sts in honeycomb stitch with a 7 mm Tunisian crochet hook.

Little Honey Crochet Baby Top
Pattern instructions
Row 1: Foundation Row. Using a 7 mm corded Tunisian crochet hook, chain 74, pull up a loop in the 2nd ch from the hook and each remaining ch, RetP.
Row 2: *Tss, tps; rep from * across to last st, Lts, RetP.
Row 3: *Tps, tss; rep from * across to last st, Lts, RetP.
Repeat rows two and three until the piece measures 7″ inches (18 cm).
Cut yarn and weave in ends.
Straps
With the right side of your work facing you; attach your yarn to the 8th stitch from the right edge with a 4.5 mm crochet hook.
Row 1-10: Sc 3, ch1, turn.
In the next row, we will work a decrease (sc2tog), leaving two stitches to work on to complete the straps.
Row 11: Sc2tog, sc.
Row 12-30: Sc 2, ch1, turn.
Cut yarn and weave in ends.
Skip 17 sts and attach your yarn to the next stitch.
Row 1-10: Sc 3, ch1, turn.
In the next row, we will work a decrease (sc2tog), leaving two stitches to work on to complete the straps.
Row 11: Sc2tog, sc.
Row 12-30: Sc 2, ch1, turn.
Cut yarn and weave in ends.
Skip 14 sts and attach your yarn to the next stitch.
Row 1-10: Sc 3, ch1, turn.
In the next row, we will work a decrease (sc2tog), leaving two stitches to work on to complete the straps.
Row 11: Sc2tog, sc.
Row 12-30: Sc 2, ch1, turn.
Cut yarn and weave in ends.
Skip 17 sts and attach your yarn to the next stitch.
Row 1-10: Sc 3, ch1, turn.
In the next row, we will work a decrease (sc2tog), leaving two stitches to work on to complete the straps.
Row 11: Sc2tog, sc.
Row 12-30: Sc 2, ch1, turn.
Cut yarn and weave in ends.
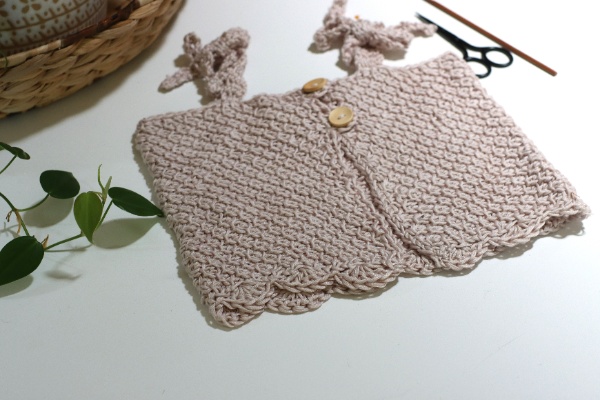
Shell Stitch Edging
Working with a 5.25 mm regular crochet hook slip stitch into the first stitch on the bottom edge, *skip 2 sts, 5 dc in next st, skip 2 sts, slip stitch in next stitch, repeat from * to end. Note: you will need to skip 3 sts at the end.
Cut yarn and weave in ends.
Button Loops
Mark out the placement of the buttons and the corresponding loops with stitch markers. I used two buttons to keep the back of the top open and airy. Three buttons would work well too.
Working with a 4.5 mm regular crochet hook, attach your yarn to the top edge with a slip stitch, chain the required number of stitches to make a loop big enough for your chosen button, skip 2, and slip stitch into the next st. Ch1, turn and work single crochet stitches over the chain to cover the loop.
Cut yarn, secure loop to starting slip stitch and weave in ends.
Attach your yarn to the position marked out earlier and repeat for the next button loop.
Weave in your ends, sew on your buttons, and you are done!
You might like . . .



Leave a Reply